Welcome Matrice Pilots!
Join our free DJI Matrice community today!
Sign up

Lens question.

Most likely because the camera does not recognize the lens properly.
Makes sense. So Starz, can you tell us about how well (or poorly) this lens plays with X5S and Go4? Specifically, do you have to set everything on the lens manually before taking off, or does it:
- Adjust focus properly when you tap to focus in Go4?
- Respond to G04-driven manual input to adjust Aperture when shooting in Aperture Priority Mode? In Manual Mode?
- Produce expected exposure when shooting in Shutter Speed priority mode with fixed ISO (so camera is trying to control exposure by adjusting aperture)?
Any other observations about lens compatibility?

Thanks.
 
  • Like
Reactions: mgphoto
Dumb lens. No electronics. All manual settings prior to use.
This lens(and I’m certainly not the expert)seems to lean towards gathering a lot of light. May be because of the large piece of glass on the front end?
I did have the aspect ratio set at 16:9 which I don’t normally do and I’ll attribute that to still learning the I2 app screen. It is a bit different than my mp’s and p4p’s screen. I had done some on the ground test shots that were really washed out and now have the aperture cranked all the way to 16 to reduce the light coming in. If that isn’t the proper way to solve the light issue, chime in. I have been very busy with work stuff and haven’t had a lot of time to experiment with this one.
If someone with better skills than I have and want to try it out, I would be willing to share. I would only ask that it be returned in the same condition as when it was received.
And yes, the I2 screen says lens not detected.6713D16A-3F0E-447C-AE58-E3F2106BE4F2.jpeg
 
Last edited:
Dumb lens. No electronics. All manual settings prior to use.
This lens(and I’m certainly not the expert)seems to lean towards gathering a lot of light. May be because of the large piece of glass on the front end?
I did have the aspect ratio set at 16:9 which I don’t normally do and I’ll attribute that to still learning the I2 app screen. It is a bit different than my mp’s and p4p’s screen. I had done some on the ground test shots that were really washed out and now have the aperture cranked all the way to 16 to reduce the light coming in. If that isn’t the proper way to solve the light issue, chime in. I have been very busy with work stuff and haven’t had a lot of time to experiment with this one.
If someone with better skills than I have and want to try it out, I would be willing to share. I would only ask that it be returned in the same condition as when it was received.


If you are getting over exposed images, you will have to do 1 or all of these and you have already adjusted the aperture. Raise the shutter speed and lower the ISO, find the happy medium to get a properly exposed image. Working with a manual lens is not the easiest on an airborne camera.

Shoot in raw if doing still images which will give you more latitude for adjusting images in post production. f16 is not usually the best setting for M4/3rd cameras including the X5S, usually f4-5.6 is better but you will have to experiment with this new lens.
 
I have picked up on the low iso theme and tend to stay in the 100 area.
If the lens has no electronic control, the shutter speed can be adjusted in the camera settings in the app?
 
  • Like
Reactions: SanCap
One of my more favorite pics from the mp2. This one took a bit of effort to catch at the right time. And some luck.6EB4CE70-C78A-4BD7-BD80-19222BBA4923.jpeg
 
Dumb lens. No electronics. All manual settings prior to use.... aspect ratio set at 16:9...will have a bit of time in the next few days to make some adjustments and report back.
Thank you. I'll second SanCap's suggestions above. In daylight conditions, try manually setting the lens somewhere between f/4 and f/8, keep ISO at 100, and then use whatever shutter speed is required to get a proper exposure (however if you need to use a shutter speed that's too slow to avoid motion blur then raise the ISO, as little as possible, or land and open up the Aperture). Shoot in manual mode and use the option to view a histogram in the Go4 screen when shooting. Pick a shutter speed that is fast enough to just avoid clipping the highlights. And definitely shoot in raw (DNG) format. In case you don't know, you can quickly adjust exposure settings in flight using the right hand dial on the RC: push it in and release it (as if it were a button) to cycle through the various settings it can control (the currently selected setting will become highlighted in the display), and rotate the dial to adjust the selected setting up or down. When shooting in Manual Exposure Mode, you can use that dial to adjust ISO, Aperture, and Shutter Speed (although setting the Aperture in the app won't actually work with this lens). Good luck!

Oh...nice pic above. You might try adjusting the white balance in a program like Lightroom to be a bit warmer, pulling down the highlights and blacks, and perhaps increasing the Dehaze, and see if you like the results. It's purely a taste thing. Those types of adjustments work in LR for both jpg and dng files, but they work better and provide more flexibility with dng files.
 
Not to forget a variable ND filter so that you can at least attempt to home in on other settings.
 
Not to forget a variable ND filter so that you can at least attempt to home in on other settings.
I don't think you are going to find a variable ND filter that will fit over that fisheye lens element! But you also should not need one, especially for still photos. Tthe main purpose of ND filters in drone work is to allow you to slow down the shutter speed to 2x the frame rate when shooting video, in order to get traditional cinematic looking video motion. For 30fps that means shooting at 1/60, which can indeed be a challenge in bright light without the use of an ND filter. But there's usually no reason to use an ND filter for still photo drone work, where you want to shoot at faster shutter speeds to minimize the risk of motion blur. Under normal daylight you should have no trouble getting a proper exposure without an ND filter, given the X5s's shutter speed range. And even video shot at high shutter speeds looks fine to most people, especially when viewed on smaller screens. Just my 2c.
 
There doesn’t seem to be a way to attach anything to the front of this lens.
Slip on maybe, no threads at all. I will be making a bushing that will add a bit of weight to help balance.
This picture should look better.EB5FE7FF-11BB-42E7-AD02-D0E6C34BA014.jpeg
 
Use a gelatin filter cut for the rear of the lens.

As in the Nikon 14mm, no way to add filtration to the front, the rear element has a slip in filter holder for cut to fit gels.
 
the rear element has a slip in filter holder for cut to fit gels
Hmmm. I think you are talking about the lens in the OP here (4mm fishey). If so, I just got mine, and I don't see any place where a filter could be slipped in at the rear of the lens. Can you post a pic that marks the slot, or otherwise help me locate that? It certainly would be useful! Thanks.
 
Hi everyone,
i was fighting about what to buy that 4mm for aerial stills with x5s.

(i already use an 8-10mm round fisheye for my FF camera on a m600)
or get an insta 360+long Stick In order to use both stills and videomaking tools.

(i often do trips with a motorcycle with a camera, lens and inspire2 wich is portable)

So i wonder whats best setup:
i2+instamount+insta360+instalongstick+camera
Vs
i2+4mm+ camera+8mm+long custom monopod

In some situation use simply my old mavic+insta then camera.


I guess the insta wins for being more versatile hands down, But 4mm still better quality and i guess picture stacking at night its easier even if all manual lens.

No shops have it around me so i cant test it, im afraid the only option with laowa it is top bottom shots and nothing more.


Any hints?
 
I guess the insta wins for being more versatile hands down, But 4mm still better quality
The comparison seems a bit apples and oranges to me, although with a small overlap. With the Insta360 you can capture true 360 video and stills, both for 360 playback and for reframing the 360 footage into standard video in post. I've done this with both a Insta360 and a GoPro Fusion hanging from my I2 (separately), and it works. But the image quality and grading flexibility are always disappointing to me. The 4mm on X5S can capture a limited subset of the reframed views you can accomplish with the Insta360, at higher resolution, and with much better control over exposure and grading (especially if you shoot in ProRes or CinemaDNG). But you can't use it to capture true 360 video, and can't do the range of reframing in post offered by the true 360 cameras. So they end up being two fundamentally different tools, and your choice of which to use depends on what you need to do.

I got the 4mm to explore the specific perspectives it offers while shooting video, and for capturing quick 360 aerial pano stills with Litchi. Up to now I have captured those with my Oly 12mm, so I have to have Litchi take a lot of image in order to capture the full 360 field of view. The result is a very high resolution pano, which is great, but it takes about 2 minutes per pano, which is sometimes impractical. My hope is that I can capture full 360 spheres much quicker in Litchi using the 4mm lens. Then I'll have to see how I feel about the loss of resolution compared to shooting them with the 12mm. Trade offs, trade offs.
 
  • Like
Reactions: rbycapri
I agree with your statement.
But i was wondering, a 360 still with that kind of lens must take lesser shots But has to be done manually.

I use hdr pano instead of litchi. Might give a shot. Thanks for reply!
meanwhile i guess i will get both. ****. I need find that tree where money can grow like apples[emoji23]
The comparison seems a bit apples and oranges to me, although with a small overlap. With the Insta360 you can capture true 360 video and stills, both for 360 playback and for reframing the 360 footage into standard video in post. I've done this with both a Insta360 and a GoPro Fusion hanging from my I2 (separately), and it works. But the image quality and grading flexibility are always disappointing to me. The 4mm on X5S can capture a limited subset of the reframed views you can accomplish with the Insta360, at higher resolution, and with much better control over exposure and grading (especially if you shoot in ProRes or CinemaDNG). But you can't use it to capture true 360 video, and can't do the range of reframing in post offered by the true 360 cameras. So they end up being two fundamentally different tools, and your choice of which to use depends on what you need to do.

I got the 4mm to explore the specific perspectives it offers while shooting video, and for capturing quick 360 aerial pano stills with Litchi. Up to now I have captured those with my Oly 12mm, so I have to have Litchi take a lot of image in order to capture the full 360 field of view. The result is a very high resolution pano, which is great, but it takes about 2 minutes per pano, which is sometimes impractical. My hope is that I can capture full 360 spheres much quicker in Litchi using the 4mm lens. Then I'll have to see how I feel about the loss of resolution compared to shooting them with the 12mm. Trade offs, trade offs.
 
I use hdr pano instead of litchi.
Litchi is an automated piloting application that I use for controlling my I2.One of the things it can do is automatically capture a set images used to stitch together panos in other applications. It can also capture brackets for HDR processing in other applications. So it is complementary to the production of HDR panos. Litchi's 360 pano capture feature is handy, but one of its least important features, at least to me, since the aircraft piloting moves it automates when capturing panos are trivial to execute manually (although with less precise control of overlap amount). I primarily purchased and use Litchi for its waypoint features. But since I have it, I also use it for 360 panos, for convenience.

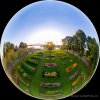
The attached low res image shows an example of an image I created, as a specialized projection of a 360 panoshere, originally captured with Litichi and stitched in ptGUI. The original 360 panorama was stitched from 23 individual tiles, each of which is an HDR image. The full res version of this final image is over 12,000 pixels in each dimension, so suitable for making fairly large prints at high res:


PrescottParkGardensAug2019-0012.jpg

I am sharing this to tie it back to your original question. You can capture and create this same basic type of images with an Insta360 camera, but at much lower IQ and resolution.
 
Last edited:

Members online

No members online now.

Forum statistics

Threads
2,790
Messages
25,576
Members
5,761
Latest member
AmberlynnHaze